
Knowledge · Sheet metal assistant guide
Draw a sheet metal part online – no CAD software needed
With the Laserteile Online sheet metal assistant you draw your base sheet right in the browser: point by point, with a dimension on every edge and an angle at every corner. Then you add flanges, holes, threads or rivet nuts and see the price straight away, including shipping and VAT – no CAD file, no registration, from a single part.
New and constantly being improved
The sheet metal assistant is a young tool and is being improved all the time – new features arrive almost every week, and feedback goes straight into development. The images on this page show the current version; individual buttons may change over time. The Laserteile Online team checks every order personally before production.
Guide
From outline to price in six steps
Our example is a 300 × 200 mm mounting plate with a 45° chamfer on one corner and a bent flange along the long side.
Step 01
Open the sheet metal assistant and choose “Draw the base sheet freely”
Open the calculator and start the sheet metal assistant via the “No CAD file?” card. The assistant’s start page offers three routes: Draw the base sheet freely, Describe the part and Design it yourself. For a shape of your own, choose “Draw the base sheet freely”.
This link takes you straight there: Draw the base sheet freely. No login is required.
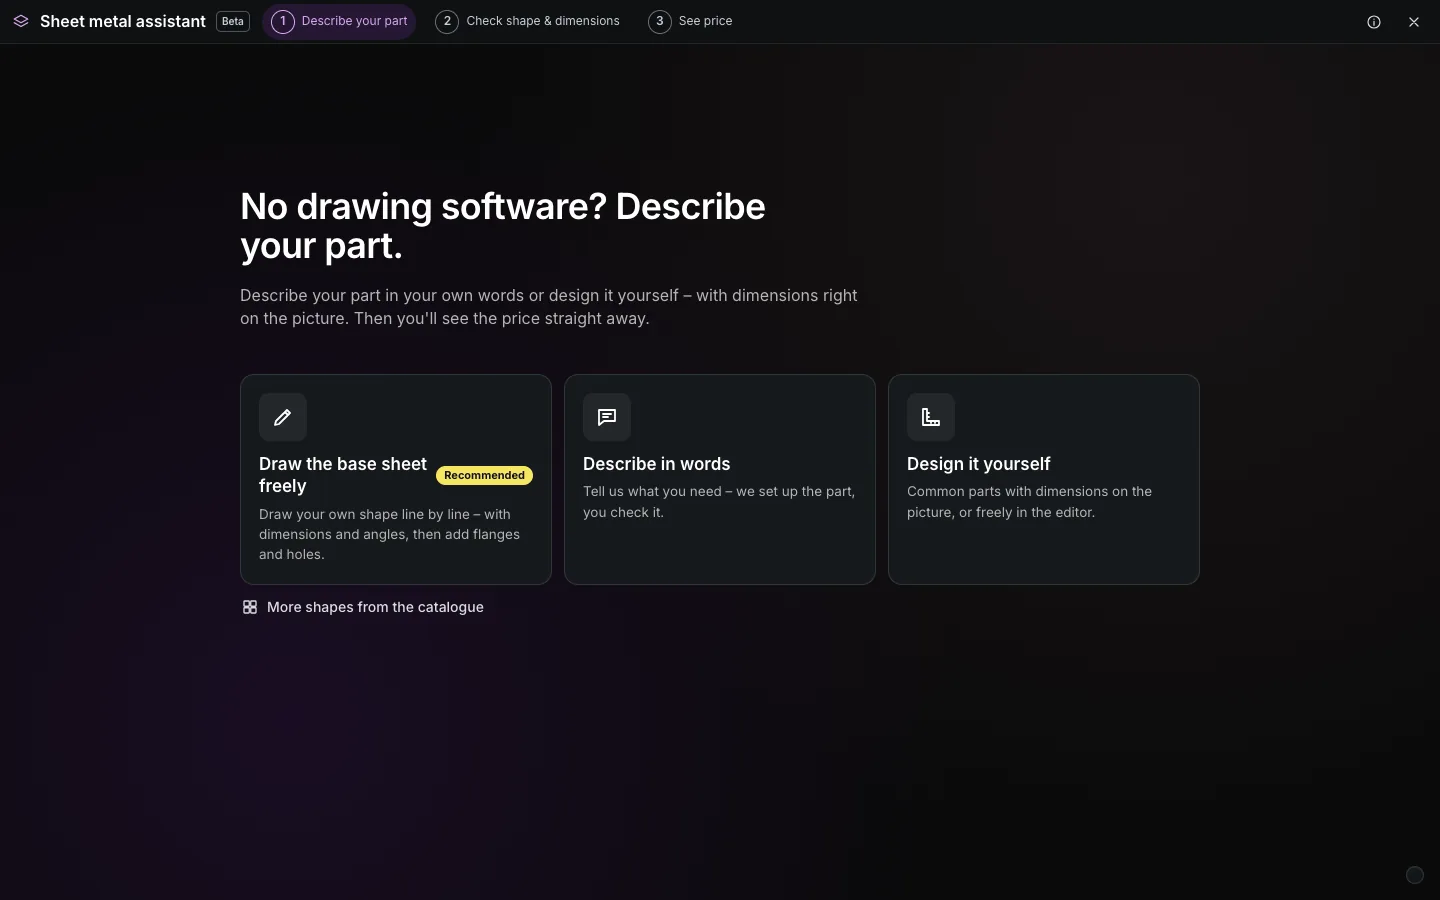
Start page of the sheet metal assistant – drawing freely is the recommended route Step 02
Draw the outline point by point
You see an empty sheet with a 10 mm grid; the Polyline tool is already active. Click the first point, then the next – every line shows its length and angle live at the crosshair. The direction snaps in 15° steps, with horizontal and vertical preferred.
The keyboard is the most precise way: while drawing, simply type a number, for example 300, and press Enter – the point lands exactly 300 mm further in the pointer’s direction. Press Tab to enter an angle instead (0° = right, 90° = up).
Tip: Made a mistake? Backspace or “Undo last point” removes the last edge. Besides the polyline there are tools for line, arc, circle, rectangle, slot, polygon and curve.
Tip: Instead of a closed outline you can also draw an open side profile, such as a Z: the assistant then offers “Extrude” and turns it into a bent part of the length you need.
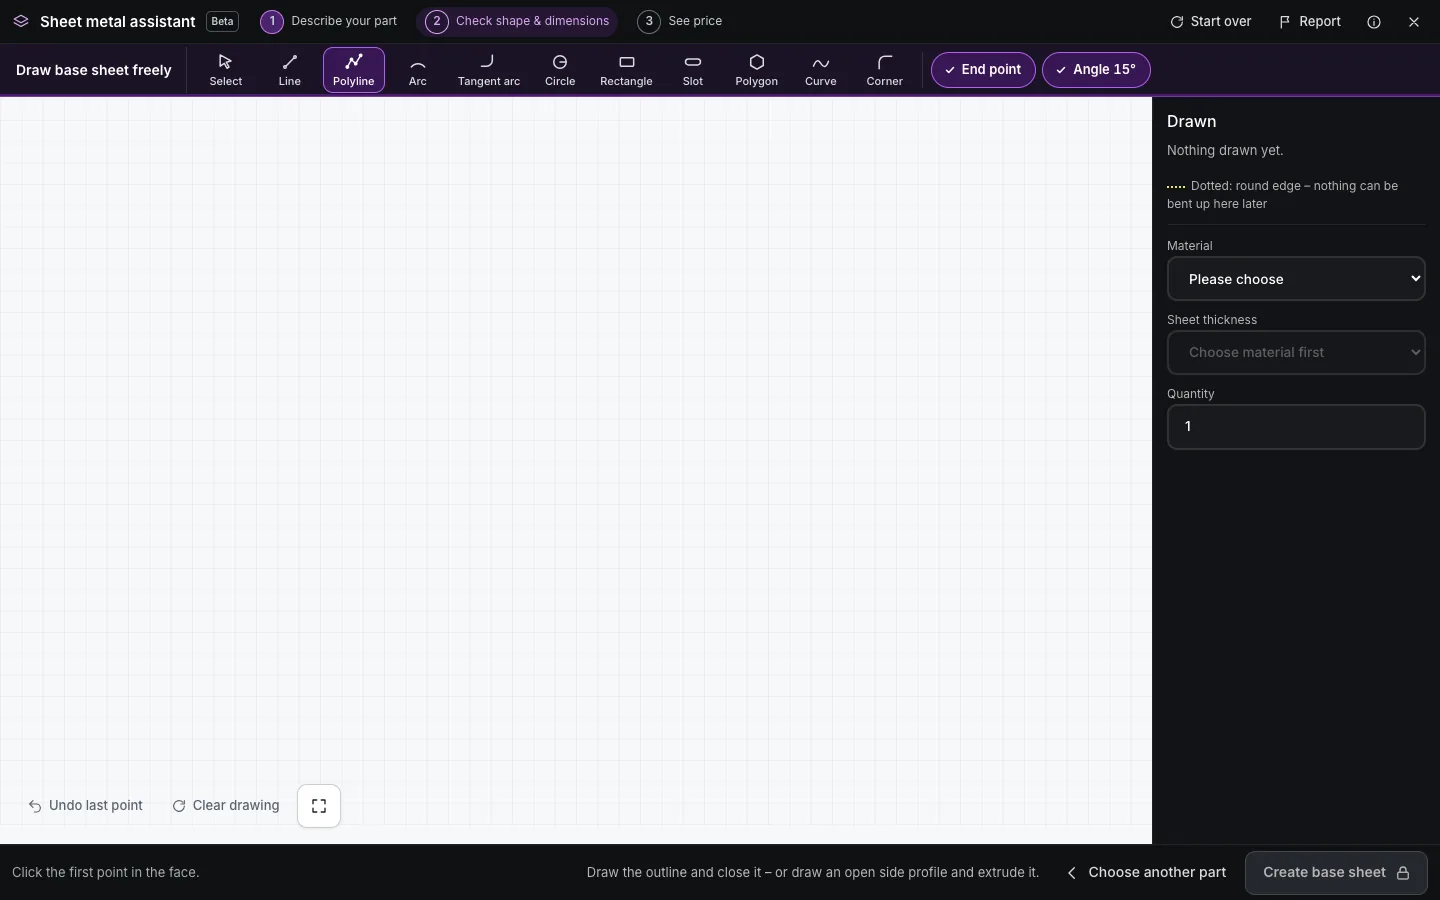
Empty sheet with grid – the polyline is already selected 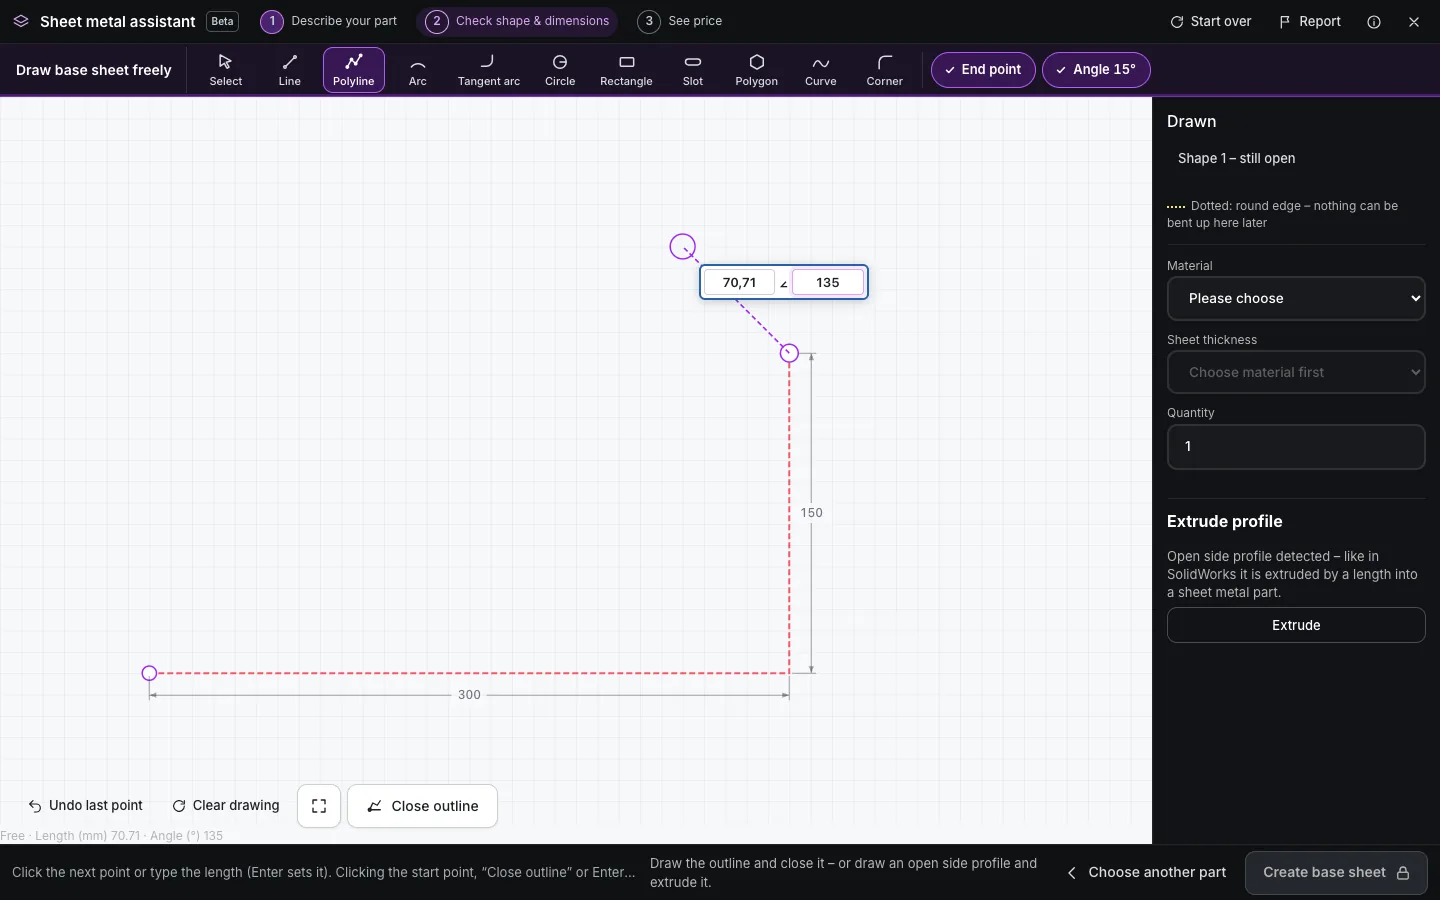
While drawing, length and angle appear right at the pointer Step 03
Close the outline and adjust the dimensions
Close the outline by clicking the start point, with the “Close outline” button or with Enter once three points are placed. Every edge then shows its length and every corner its inside angle.
Each of these numbers can be clicked: enter the dimension you want and the outline adapts. With the Corner tool you round or chamfer individual corners of the outline. Shapes you draw entirely inside the outline – a circle or a slot, for example – automatically become cut-outs in the sheet.
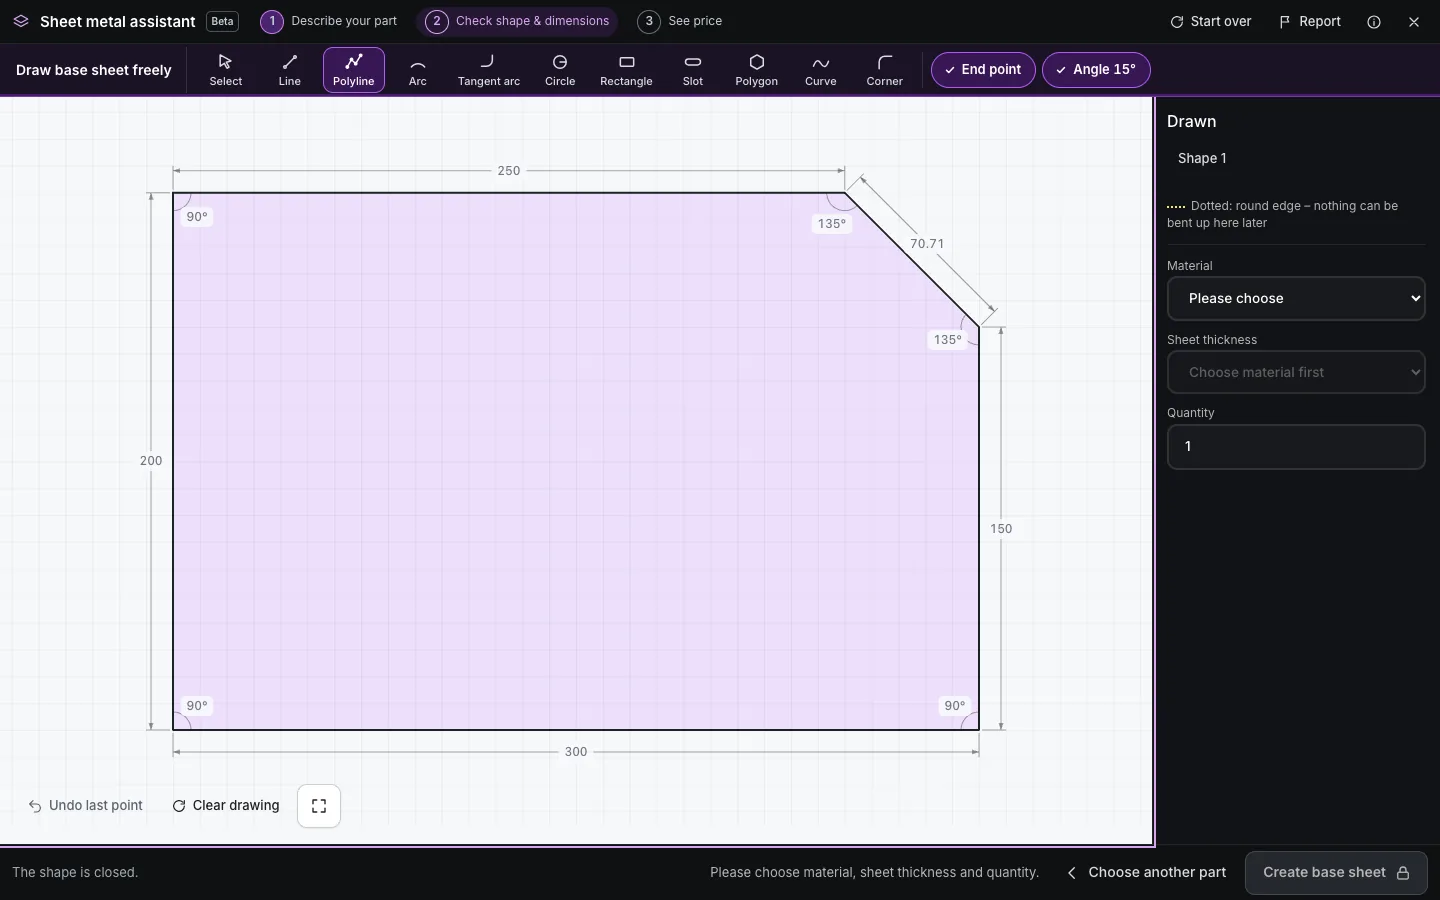
Closed outline: click any length or angle to change it Step 04
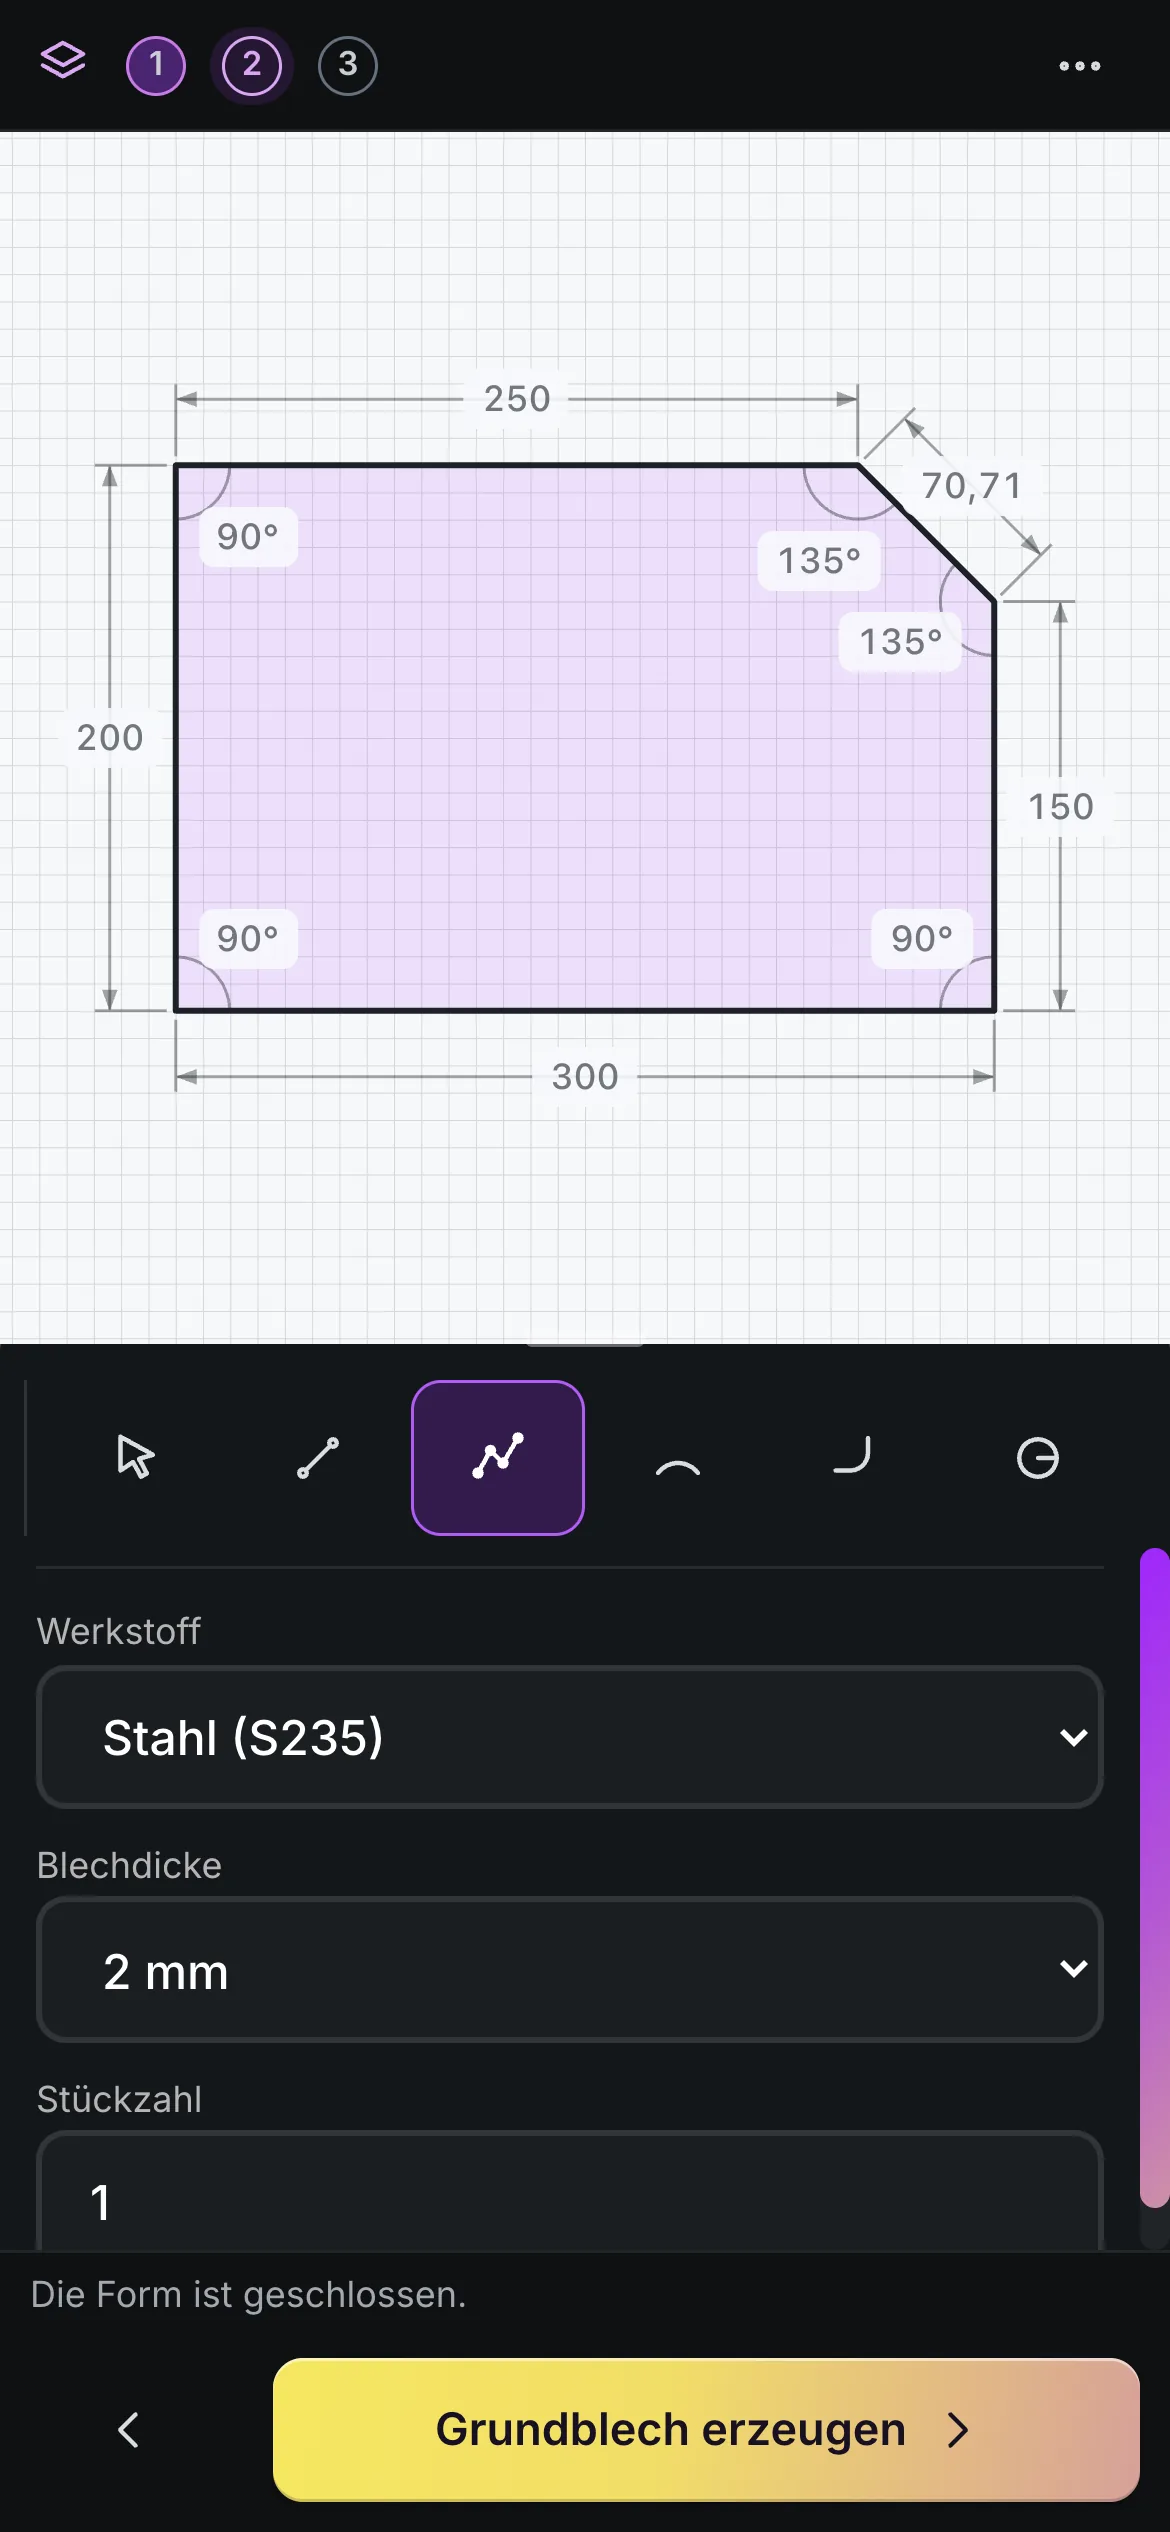
Choose material, sheet thickness and quantity
To the right of the sheet, choose the material, then the sheet thickness from the matching list, and the quantity. For orientation: steel is available up to 20 mm, stainless steel up to 15 mm and aluminium up to 12 mm – more on the pages for steel, stainless steel and aluminium.
As long as something is missing, the yellow main button is locked and shows a padlock; clicking it takes you straight to the missing entry. Once everything is chosen, continue with “Create base sheet”.
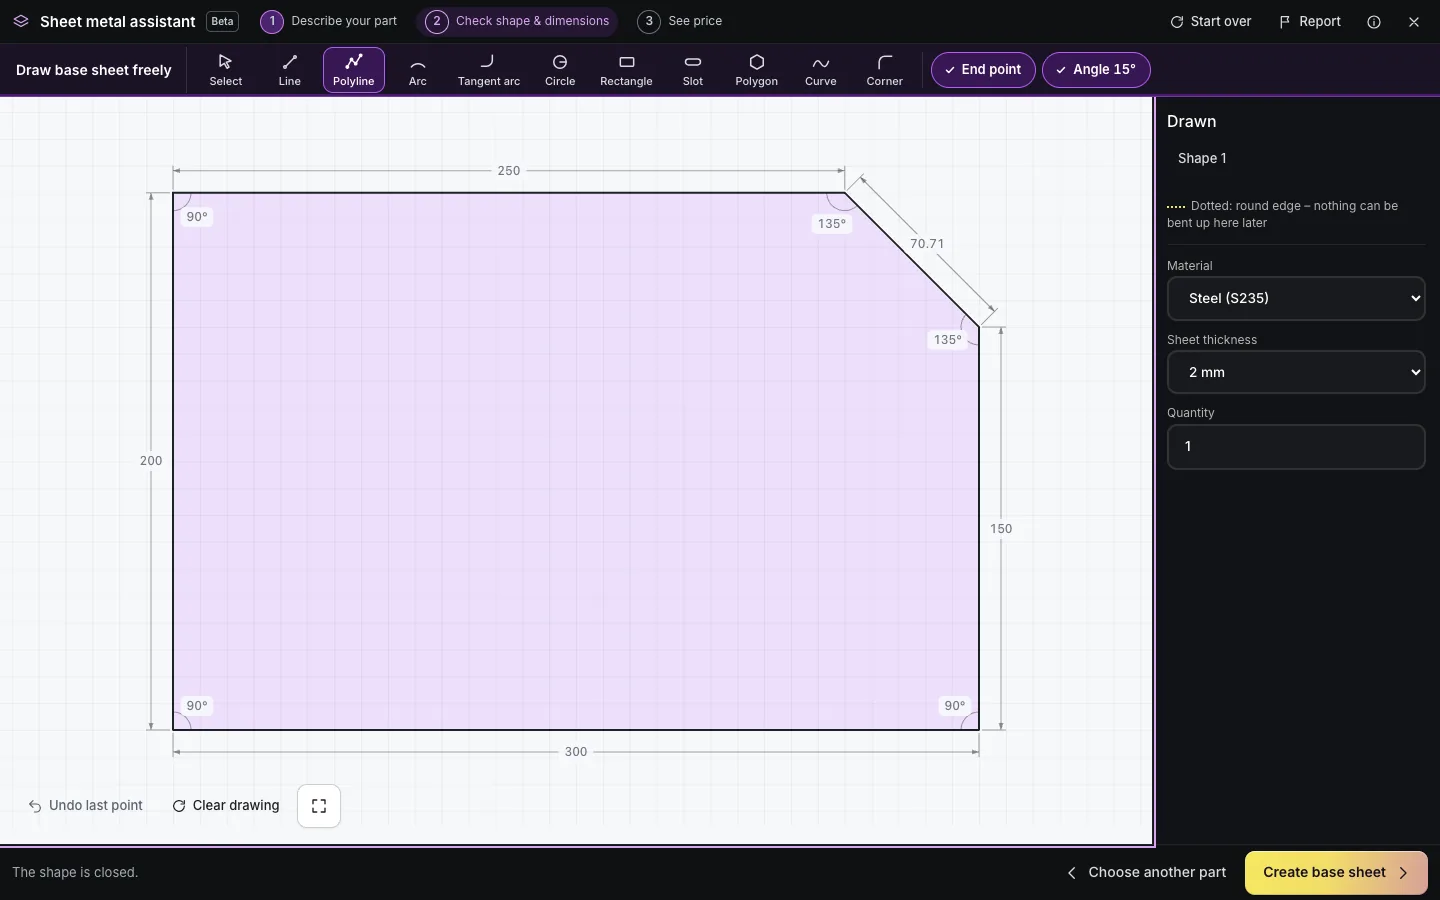
Material, thickness and quantity – then “Create base sheet” Step 05
Add flanges, holes and finishing
In the editor your sheet appears as a 3D model on the stage. Choose the Flange tool at the top and click a straight edge – the flange is created. On the right you set its length (outside dimension), angle (90°, 45°, 135° or custom), direction and offsets. Where two flanges meet, close the corner with one click.
Hole, cut-out, pattern, thread, rivet nut, weld nut, stud and seam are also available. Flat pattern shows the flat blank. How close holes may sit to a bend is explained on the manufacturing guidelines page.
Tip: Ctrl + Z undoes the last step, Ctrl + Y redoes it. The Help button shows a short introduction at any time.
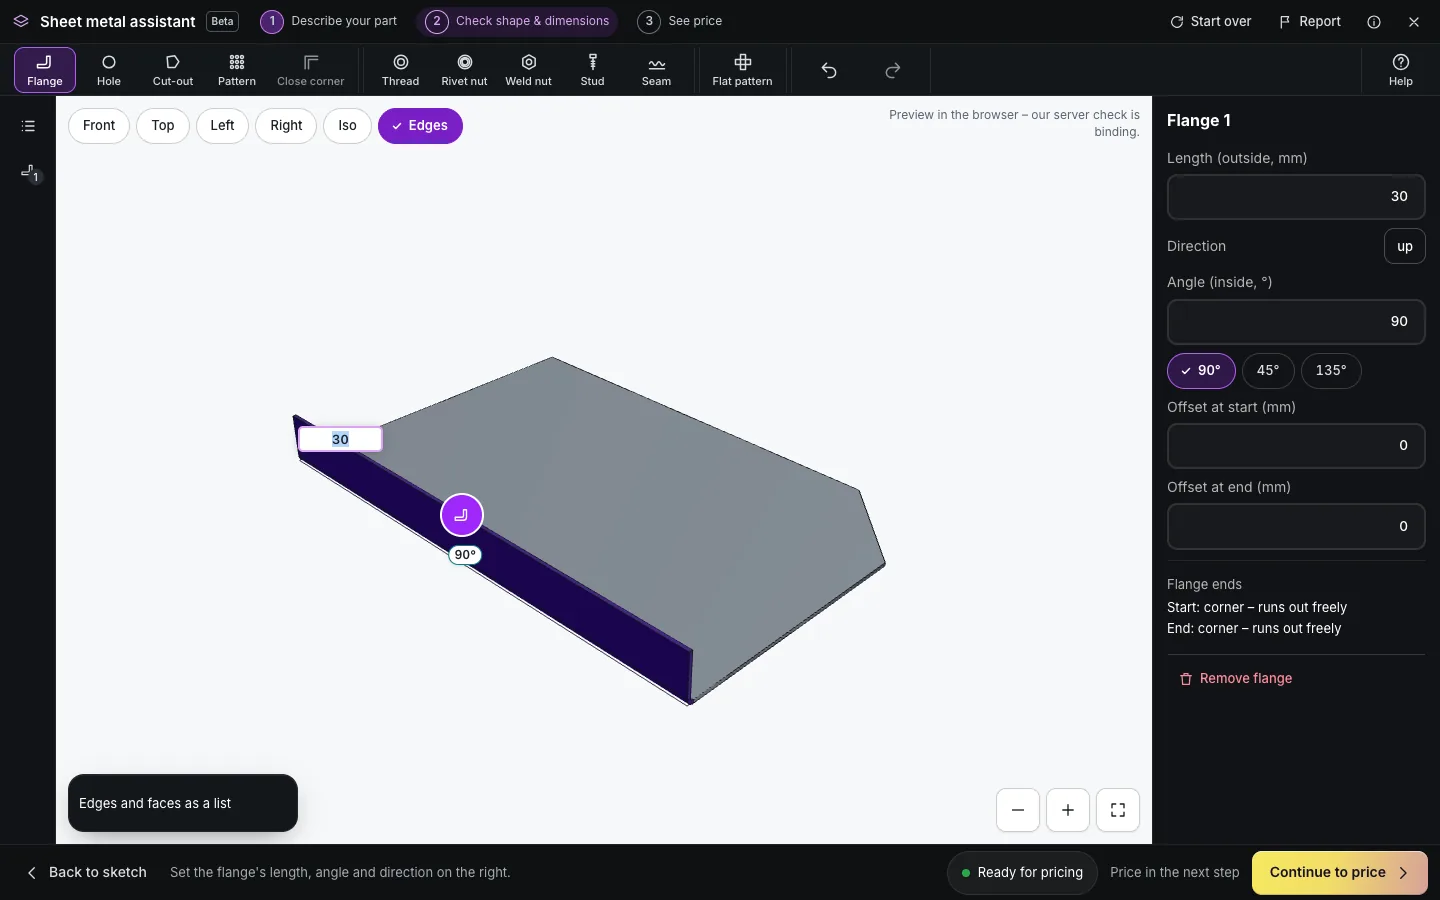
Editor: flange on the long edge, its dimensions on the right Step 06
Check the part and see the price
With “Continue to price” the server checks your part and creates a 3D preview and a dimensioned check drawing – usually within seconds. Compare both with what you have in mind, tick “My part and its dimensions are correct.” and click “Show price”.
The price includes shipping and VAT. The quantity selector (1, 5, 10, 50 or your own number) shows at once how the unit price drops. You can then order directly or request a quote. Laserteile Online delivers laser cutting and bending from 2 working days – the price factors are explained in the guide laser cutting cost.
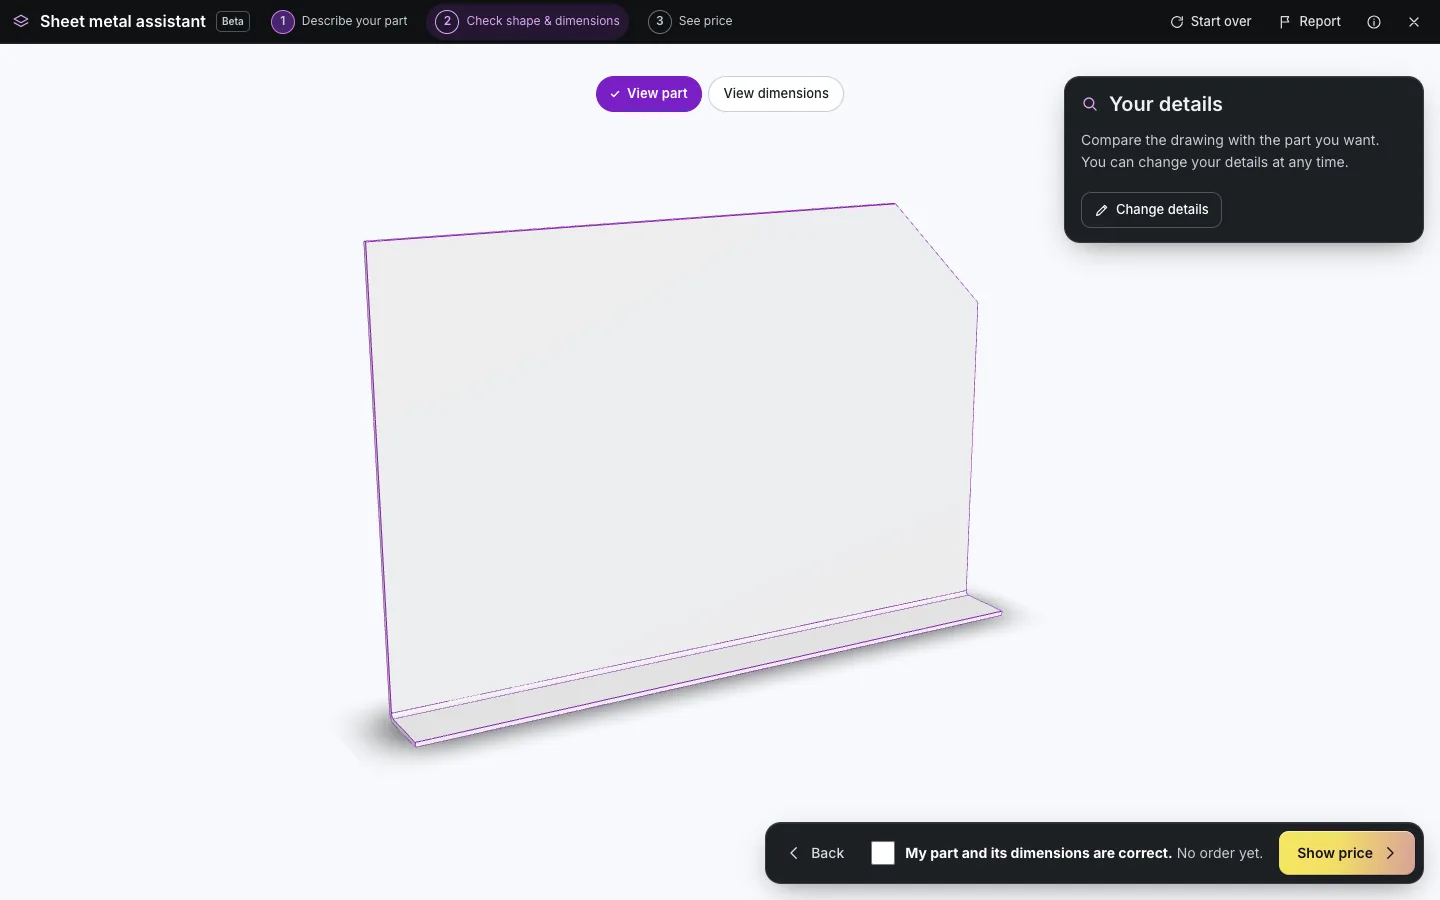
Server preview: this is how we receive your part 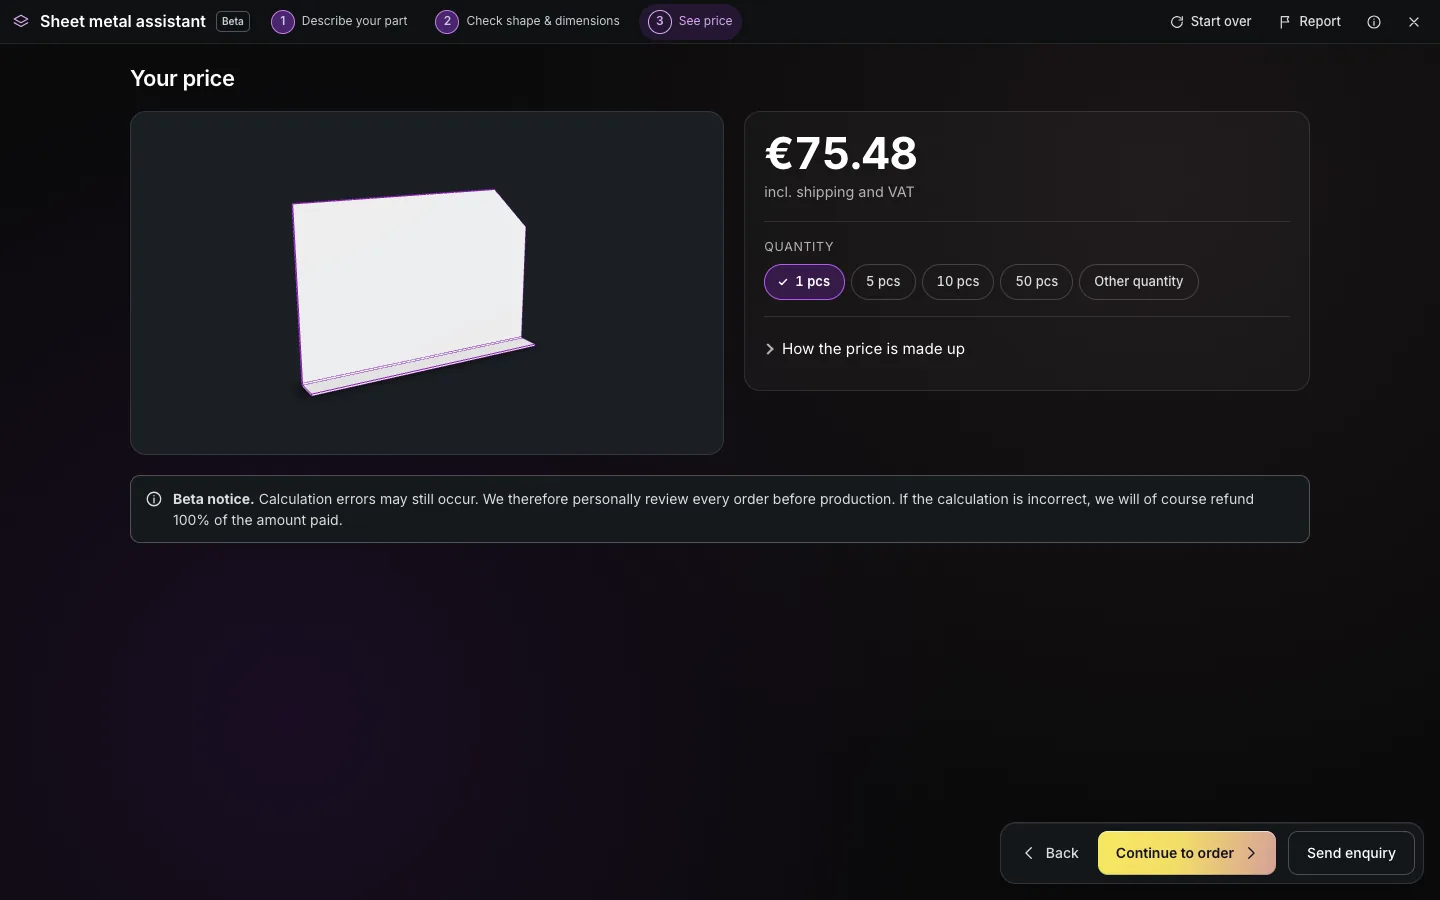
Price including shipping and VAT, with quantity breaks
Keyboard
The most important keys while drawing
With the keyboard you draw to exact dimensions without having to aim with the mouse.
| Key | Effect |
|---|---|
| Type a number, then Enter | Places the next point exactly that far in the pointer’s direction (comma or full stop as decimal separator). |
| Tab | Switches the length field to the angle: 0° to the right, 90° upwards. |
| Enter from three points | Closes the outline. |
| Backspace | Removes the last edge. |
| Esc | Discards the current entry – your drawing stays. |
| Arrow keys + Space | Moves a keyboard pointer in 10 mm steps (1 mm with Shift) and places a point there. |
| Hold Alt | Draws without snapping. |
| Ctrl + Z / Ctrl + Y | Undo and redo in the editor. |
Safety
What the assistant checks for you
The assistant shows problems where they occur – marked in red, with one sentence on what to do.
Open or crossing outlines
An outline must be closed and must not intersect itself. Affected edges turn red and you cannot continue until it is fixed.
Size and edge length
Very short edges and parts larger than 3000 mm are reported immediately. Parts are cut from sheets up to 3000 × 1500 mm.
Bendability
Flange length, hole distances to the bend and sheet thickness are checked by the server against the workshop’s rules. If a flange cannot be bent at your thickness, the part says so directly.
Personal check before production
On top of the automatic check, the team looks at every order before production – at no extra cost.
On the go
Drawing on your smartphone too
Free drawing also works on a phone: the crosshair sits above your finger so you can see where the point lands; pinch with two fingers to zoom and move the sheet. You enter length and angle comfortably in fields and place the point with a button.
For flanges, cut-outs and seams in the editor, a tablet or laptop is recommended – there is more room for the 3D view.
Which route suits you?
Draw, pick a standard part or upload your own file
Draw the base sheet freely
For your own shapes: covers, brackets, mounting plates, gusset plates with chamfers – anything you can describe as an outline with dimensions.
Design it yourself
For standard shapes such as plate, angle, U-profile, tray or box: pick a ready-made part, enter the dimensions on the picture, done.
Your own CAD file
If you already have a drawing, upload DXF, DWG or STEP straight to the calculator. The guide create a DXF file shows how to prepare a clean file.
Development
The sheet metal assistant is constantly being improved
The assistant grows with its users: new tools, better handling on phones and additional finishing options are added at short intervals. This guide is updated with every major change.
Something doesn’t work as expected or a feature is missing? At the top of the assistant you’ll find the “Report” button – describe the bug or your wish there, with a screenshot if you like. For anything that can’t be drawn (yet), the quote request is always open.
FAQ
Frequently asked questions about drawing in the sheet metal assistant
Do I need CAD software to order a sheet metal part?
No. In the sheet metal assistant you draw the outline right in the browser, enter the dimensions and add flanges and holes. The 3D model, check drawing and price are created automatically – no software to install and no registration.
How precisely can I draw?
As precisely as you type dimensions: lengths and angles are entered on the keyboard, and once the outline is closed every edge length and inside angle can be clicked and changed. The direction snaps in 15° steps; hold Alt to draw freely.
Can I draw holes and cut-outs right away?
Yes. Shapes lying entirely inside the outline – circle, rectangle, slot, polygon or a closed polyline – automatically become cut-outs. In the editor you can add further holes, hole patterns and threads.
Can the drawn sheet also be bent?
Yes. In the editor you add a flange to any straight edge, with length, angle and direction. The server checks whether the flange can be bent at your sheet thickness and flags it directly on the part if not.
How large can a drawn part be?
The outline may be up to 3000 mm in size and consist of up to 200 edges and arcs. Parts are cut from sheets up to 3000 × 1500 mm; the server makes the binding size check before the price is shown.
What does my drawn part cost?
You see the price right after the check, including shipping and VAT and for several quantities. You can order from a single part; what drives the price is explained in the guide on laser cutting cost.
Does the sheet metal assistant work on a phone?
Drawing the base sheet freely does – with the crosshair above your finger and input fields for length and angle. Flanges, cut-outs and seams in the editor are best added on a tablet or laptop.
Your own shape? Draw the base sheet now and see the price.
Draw the outline, enter the dimensions, add flanges and holes – the price including shipping is ready in a few minutes, no registration, from a single part.
Delivery from 2 working days · Minimum order value €30 net · Express on request